This guide is beginner friendly, the examples I gave I can promise that after reading this guide you can teach a 8th standard kid. Git and GitHub are common tools used in programming. They help you manage different versions of your code and collaborate with other developers.
But before going deep dive into it, let’s understand why even we need those tools. why they even exist.
Why we need version control ?
Suppose you developed one software and released version 1.0 of that. After adding some more feature you are ready to launch version 2.0 of your application. You added the code into the version 1.0 and your application stopped working. Now you are praying to god if somehow you can get your previous code before changes. Here is the version control systems comes into the picture. This is one scenario.
If I talk about the other scenario, Lets say you and 3 of your friends are working on one software project and you all are contributing your code to that project. And all of you are working from different locations. And you all are working on different features of the app. Now if you want to merge all the changes and keeps the track of who made which changes. Version control is here to help you.
Let’s Know more about version control systems and how they can help us here.
What is version control ?
Version control is the system which records changes to a file and set of files over time so that you can recall any specific version. Lets take the above example. After breaking down your code, You can say to version control to give the code changes till the version 1. Version control will give you the version 1 of your software back. Because it maintains the history of all the changes.
Some more features which version control systems provide :
Informs us about who, what, when and why certain changes happened.
Enhance the product development speed by efficient collaboration.
Tracks every small changes done into the code.
Helps in recovery in case of any disaster or system failure.
There are so many version control systems are available in market. But the most popular one is git. So lets see how can we install in our system and start with it.
Introduction to Git —
Git is famous and one of the most widely used version control system. It was developed in 2005 by Linus Torvalds. A staggering number of software projects rely on git for version control, including commercial project as well as open source.
Installing Git —
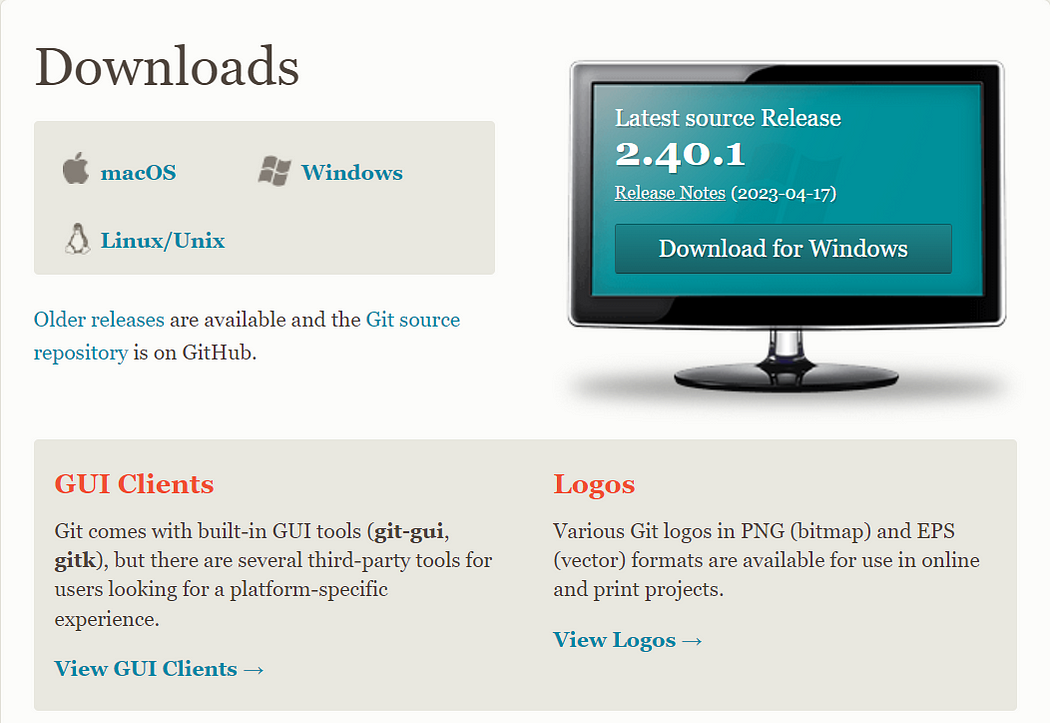
For using the git you need to install it in your system. To do this you can download the latest version from this official website. You can select and download it according to your operating system.

Git Basics —
Now i hope you installed the git in your system. To check if you have successfully installed it open your command prompt and run this command on the command line git — version This command will show you the current git version in your computer.

How to create and Initialize a project in git -
we are finally done with installing and setting up a git in our computer. It is now time to create one project and initialize a git on it. For that i have created one folder called myproject on my D drive. Using the command line navigate to your project folder.
For that give command -
cd d:
cd myproject
And you will be on your project folder. For as of now in this folder i have only one file called mytodolist.txt in which below content is there.

Now lets initialize git on our project to track all the changes. For that run this command git initAnd it will Initialize the git repository on this current project.

Now with git init I have successfully initialized the git in my project. And on my project folder one folder called .git created. which will store all the information about changes and version on this project.
Add and commit files —
Before we add or commit our files you need to understand the different stages of a file being tracked in the git. Lets understand this with the analogy of marriage photography.
Staged state -
A file in the staged state means this file is ready to be committed. In this state all necessary changes have been made so that next step is to move to commit state.
You can understand this with the analogy of marriage photograph session. Before taking the photograph of the newly married couple they come on stage and check that if the makeup and dress all are perfect before taking photo. This is called staged state.
Modified state -
A file in modified state has some changes which is not saved yet. This means that state of the file has been changed from its previous committed state.
With the above analogy, suppose you have taken one picture of couples in one pose now they have changed their pose. So the state is changed and for saving these changes you have to again take the picture means commit again those changes.
Committed state -
A file in the committed state when all the changes made to the file have been saved in the local repo.
With the above analogy, Files in the committed state means pictures has been taken for the poses and changes saved into the camera. In this scenario is in our .git file.
Now we understood about all the stages in git. Now let’s in practice on our project folder.
How to add files in git —
when we first initialize git on our project. It creates the empty .git folder means currently it does not have any information about current files in the directory. To add current files for tracking into the git we use command git add . Here . means everything present into the folder. But if you want to add a specific file, Maybe todo.txt then you can use git add mytodolist.txt
Now after this our file is in staged state. You will not get any response after this command, But to know the status of your file you can use the command git status

You can see we have new file which is in staged state in green color.
How to add commit files in Git -
The next state for a file after staged state is commit state. To commit the file we use command git commit -m “Message” In this command git commit says to git that file are ready to commit. -m is shorthand for message and after that in inverted commas you can provide the message about the changes you want to made for later reference.
After executing this command you will get response something like this.

Now our file is in committed state. With that our file change history is saved in the local repo. For checking the change and commit history you can use command git log

Like above you can see i had made one commit and message is also coming.
Now we have understood how to initialize and commit our changes into the git. Now lets see what github is and what benefits it’s going to offer.
What is git hub ?
In official terms, “GitHub is a for-profit company that offers a cloud-based Git repository hosting service.”
With our same analogy, for saving the marriage photos we upload it on google drive so we can access anywhere. Same for saving our code on the cloud which will be accessible by anyone. For that purpose we use github. Github is cloud based hosting service like google drive which host our code.
Now you have code and change history related to that code in your local repository. Now lets see how we can host or in simple terms can upload it on the github. So we can access from anywhere and collaborate with anyone in the world.
How to push our project repository to GitHub —
I will divide this section into steps. So you can follow easily -
Step 1 — Create a github account
To be able to use github, you have to create your account first. For that you go to github website and create one account.
Step 2 — Create new repository
After creating account, Go and click on + symbol on the top right corner of the page and choose new repository. Give any name to your repository and scroll down and select create repository.
Step 3 — Push the repository to github
After you will create the repo you will be redirected to the page that tells how to create a repo locally or push an existing one. So we already have our repo with changes. so we are going to push existing one only.
For that first we need to connect our local repo with the github repo. for that you can use this command git remote add origin git remote add origin https://github.com/bhanupaliwal/myrepo.git This URL will be different for everyone. You will get this url from your git hub repo when you will create new repo.

This command will make the connection between your local and remote github repo.
And the final things, to push all the code and changes to the github repo you can use git push -u origin main It will push all the code and changes from local to the main branch of the github repo.
Git branching —
With git branching, you can create a copy of your entire project. And make the changes in the project without messing up the original copy.
Suppose you have to add one more task in the above todo list but you are not sure this is important to add or not. So by the use of git branching you can create one copy of the original list called duplicate and add that task into it. And when you are sure that this task is important and it should be in my main list then you can merge these two branches.
Before i start with more branching concept. I want to show you the current status of my repo.

Means currently i have one branch called main. The black arrow here is representing the total no of commits. So as of now I have one commit.
Now lets say i want to add one task in my list which i am not sure about it. so i will create new branch and add that task into it. For that you can use command git branch duplicate This command will create new branch called duplicate. And for moving to this command use git checkout duplicate. And now your pointer is on duplicate branch.

Now to add that unimportant task in duplicate. Just add that task into the mytodolist.txt and commit that. So after committing the new task in duplicate branch, status will look like this.

Now main branch only have the changes till the first commit but my duplicate branch have one more additional commit for that unimportant task which is not finalized yet. Now suppose that task is finalized and you want to add that to the main list. For that you have to merge the duplicate branch with main branch. For that first move the pointer from duplicate to main branch using command git checkout main And for merging the changes command is git merge duplicate.
After the merge my main branch will have the same changes as duplicate branch.

Git branching is very useful when we have to work of additional features of any application. We can work on that without disturbing the original code. Suppose if anything goes wrong with that features it will not affect the working or original application code. With that i hope you are very much clear with the branching feature of the git.
How to pull the repository in GitHub —
To pull in git means to clone a remote repository current state into your local computer. This comes in handy when you want to work on your repo from a different computer or you want to contribute to an open source project online.
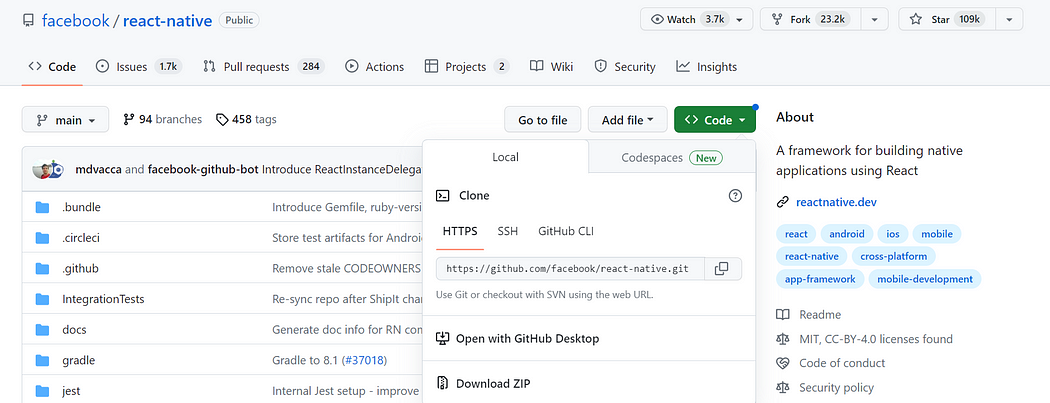
For cloning or pulling a repo, Go to github and after that goto repository main page. You should see a green button says “code”. When you click on the button, you should see some options in a dropdown menu. Go on and copy the HTTPS URL.

After that, run this command on your cmd git clone https://github.com/facebook/react-native.gitThis command pulls the remote repository into your local computer in a folder called react-native.
Conclusion -
This article covered the basic commands that will help you to start with git and github. You can now use git in your projects and leverage its features. But these are not the only commands and features that git provide. So feel free to research and learn about advance github commands.
Thanks for reading this, Follow Bhanu Paliwal for more. Feel free to follow me on Twitter as well.
Happy Learning :)

